Installing Amper for automated cycle counts

What you'll need

Gateway
(“GW” on device)
Aggregator
(“AG” on device with green screw post connectors on top)
CAT5 cable
Power supply cable
Tools
  • Small screwdriver, wire strippers, wire
  • Tools to open machine panel and insert new wires into machine output or input terminal blocks
  • A machine schematic or wiring diagram
Recommended skills
  • Opening up the power and/or control panels on the machine.
  • Determining the best signal or sensor output available that corresponds to a machine cycle.
  • Reading machine schematics and identifying signal wires inside the machine.

INSTALL THE DIGITAL AGGREGATOR

Steps at a glance

This part of the installation will require you to connect the digital aggregator and study your machine schematic to identify the utilization signal you'll be working with.

Connect the aggregator

Mount aggregator

Place the aggregator inside the machine’s power panel (or outside panel if using an external sensor).

Connect aggregator to gateway or existing device

If an existing analog aggregator is installed: Connect the digital aggregator to the existing device via CAT5 cable.

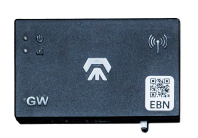
If there is no existing device: Connect the digital aggregator to the gateway via CAT5 cable.

Verify connection

Check for a solid blue LED light in the lower left corner of the digital aggregator.

This indicates power and successful gateway connection.

    Identify signals and outputs

    First you must identify which signal you will be working with. Then, you’ll locate that signal in your machine’s power panel and identify the nearest power outputs.

    Choose a suitable signal for for cycle counting

    It’s critical to choose a signal that changes back and forth exactly once per cycle.

    • M-Code: Program a spare M-Code output (if available) into your end-of-program macro (e.g. an M30) to momentarily turn the output on when the count should be registered.
    • Other high-accuracy options include existing signals in your machine:
      - Part presence or proximity sensor output
      - Bar feeder control
      - Chuck clamp closed
      - Solenoid control (for pneumatic or hydraulic actions that happen once per cycle)
      - Control for any other discrete operations that happen once per cycle
    • If your machine does not have a suitable signal that can represent ongoing production, then installing an external sensor may be the best option (e.g. proximity switch, light curtain, or line beam sensor).
    Connecting a dedicated sensor directly to the digital aggregator? You'll need to add a dummy load since the digital aggregator does not source or sink current at the input.
    Locate the signal in your machine
    • Go to the page that lists “Machine I/O” or “Outputs” in your machine schematic or wiring diagram.
    • Find the name corresponding to your chosen signal.
    • Note the output or wire label code and the module label code.
    • Use the codes to locate the module and the output or signal wire in your machine panel.
    Identify nearby power outputs
    It is usually best to find existing 24V and 0V or ground outputs on the same module as the selected signal.
    • Identify a +24V (or +12V if applicable) power output on your machine.
    • Identify a 0V ground output (usually different than the chassis or earth ground).
    • Refer to the same page on the schematic and the page for the machine DC power supply to confirm the appropriate outputs if you are not sure.
    • Place the digital aggregator near the relevant outputs if you haven’t already done so.

    Connect to your machine

    Connect to power
    • Cut two insulated wires and strip the ends. They should be long enough to connect the machine's power outputs to the digital aggregator.
    • Use one wire to connect the +24V output to the corresponding screw post input on the digital aggregator (the outermost of the three-pin connector).
    • Use the other wire to connect the 0V to the innermost screw post of the same connector.
    • Leave the middle screw post empty.
    • If successfully connected, the rightmost LED should light up when the machine is powered on and +24V power is available.
    Connect to the chosen signal
    The signal will be connected with a single wire.
    • If capturing an existing signal, simply slip the new wire into the output alongside the existing one.
      Tight fit? You may need to remove the existing wire, twist the new one around it, and then reinsert it.
    • If using an empty output, insert the new wire as normal. The wire can then be screwed into the digital aggregator’s input.

    COMPLETE CONFIGURATION

    Set up your cycle counts add-on in the Amper app
    Utilization must be set up first before any cycle count add ons
    • Go to https://app.amper.xyz (or click "complete configuration" below).
    • Go to Settings > Hardware Screen if you're not automatically directed to the instructions.
    • Locate the machine you're adding cycle counts to.
    • Click on the "part count" tab and then click "new configuration" at the bottom right. The app will guide you through entering your information.
    • Click the “notify us” button at the top right of the page to tell us your machines are ready for calibration.
      Only see a “reconfigure” button? Click it and it will change to “notify us.” Click it again and you’re ready to go.
    Sit back

    Once you submit your machine configuration info, our team will begin tuning your machines and setting up your dashboard. This typically takes 1 week for pilots and 14-21 days for larger full deployments.